This post may contain affiliate links, which means I earn a small commission if you purchase something I recommend- at no additional cost to you! As an Amazon Associate I earn from qualifying purchases. Thank you for supporting this blog! Full disclosure here.
If you’re looking for an easy way to make your patio feel a little more finished for spring and summer, this might be my favorite DIY yet.
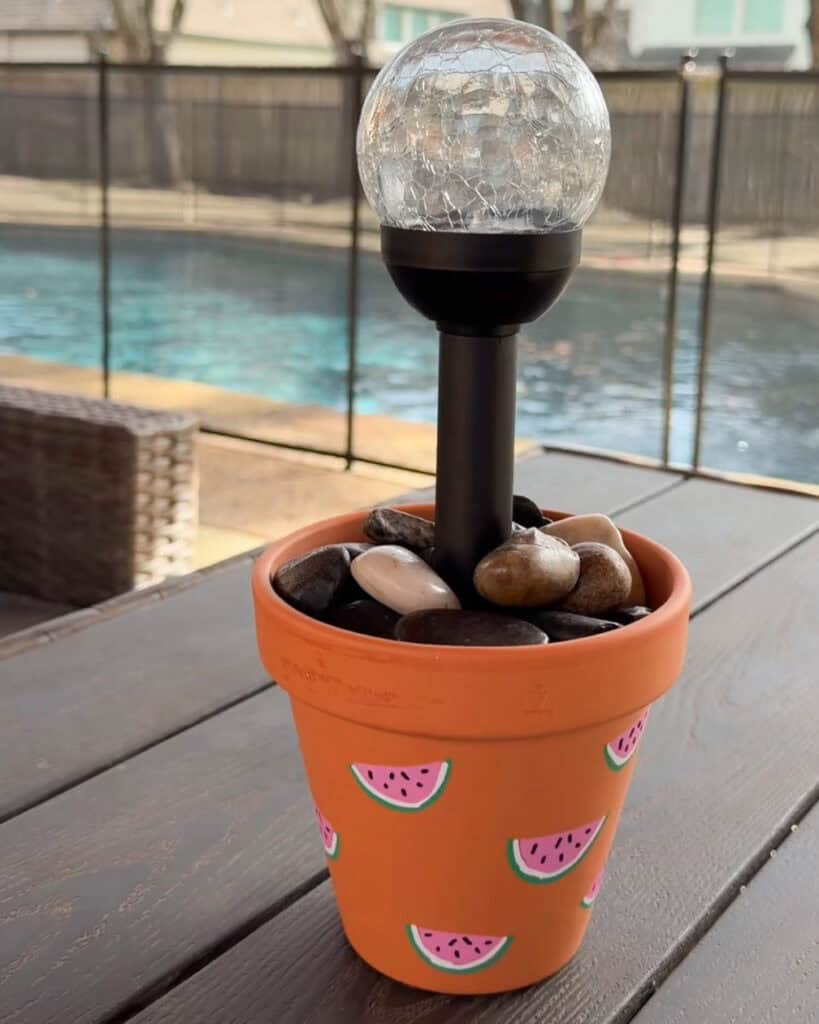
I took a simple terra cotta planter, added a solar light, and turned it into the cutest little patio table light. It looks high-end, but it’s actually such an easy project — and you can customize it however you want.
This is one of those DIYs that’s both fun and functional, which is always a win.
This project is sponsored by PLAID crafts and Walmart. Thank you for supporting the brands we love!
Why You’ll Love This DIY Patio Light
- It looks like something you’d buy at a home store
- Completely customizable with color and design
- Budget-friendly and beginner-friendly
- Perfect for spring and summer outdoor spaces
- No wiring or tools required
Supplies Needed
All supplies can be found at Walmart:
- Small terra cotta planter
- Solar ground stake light
- Floral foam
- River rocks or decorative stones
- Apple Barrel multi-surface paint pens
- Optional: clear sealer for outdoor durability
Step-by-Step: How to Make a DIY Patio Table Light
Step 1: Decorate Your Planter
Start by decorating your terra cotta planter using the Apple Barrel multi-surface paint pens.

This is where you can get creative — I painted little watermelon designs, but you can do:
- florals
- stripes
- dots
- patterns
- or keep it neutral for a more high-end look

The paint pens make it really easy to add clean lines and detailed designs directly onto the pot.
Let dry completely.

Step 2: Add the Base
Place a piece of floral foam into the bottom of the planter.
This will help hold your solar light securely in place.
Step 3: Insert the Solar Light
Take your solar light and remove the ground stake.
Insert the light into the floral foam so it stands upright in the center of the planter.

Step 4: Secure with Rocks
Fill the planter with river rocks or decorative stones.
This does two things:
- stabilizes the light
- gives the planter a clean, finished look
Fill up to the top of the planter.
Step 5: Place and Enjoy
Set your new patio light on a table, side table, or outdoor seating area.
As the sun goes down, the solar light will automatically turn on and give your space the prettiest glow.

Styling Ideas
These look so cute:
- On a patio table
- Next to outdoor seating
- On a front porch
- Grouped in pairs for a more styled look
You can even make multiple with different designs for a coordinated outdoor setup.
Final Thoughts
This is one of those projects that proves you don’t need expensive decor to create a beautiful space.
A simple planter + a little creativity = something that looks custom, functional, and completely your own.
And I love that it’s something you’ll actually use all season long.
Want More Easy DIY Ideas?
If you love simple, budget-friendly DIYs that make your home feel more fun and intentional, check out more projects here on the blog or Instagram.

hi! I'm shannon
I’m a wife, mom of three, doctor, and blogger! In 2018, I decided to turn my mom blog, into a personal finance blog so others could follow along on our journey to pay off over HALF a MILLION dollars in student loan and practice start up debt. I hope you enjoy following along, and maybe even find some inspiration along the way.