This post may contain affiliate links, which means I earn a small commission if you purchase something I recommend- at no additional cost to you! As an Amazon Associate I earn from qualifying purchases. Thank you for supporting this blog! Full disclosure here.
These DIY Pom Pom Christmas Trees are such a fun addition to your holiday decor! They’re an easy Christmas DIY that any age can make!
Christmas decor can be so different! We love color in our house, and so our Christmas decor can reflect that! I love to craft during the holidays, and these trees are so much fun to make!
Making your own Christmas decorations can often save you so much money! Not only is it frugal, but it’s FUN! Get together with a couple girlfriends and make something cute for the holidays! Grab the kids and help them make their own too!
Make crafting one of your new family traditions for the holidays, pop in a favorite holiday movie and make some delicious hot chocolate and make some memories together!
Pom Pom Christmas Tree Variations
Use these ideas to mix up how your pom-pom trees look:
- Color. We picked bright colors to match the theme of our decor, but you can choose any color scheme! Pick a solid color, use traditional Christmas tree colors, make a solid green tree – be creative!
- Glitter. Use glittery pom poms for a sparkly look!
- Pom Poms. Use pom poms of different size and shape to give your tree a different look.
- Cones. Use large cones, or small ones. Use cones of all the same size or mix it up!
How to make Christmas Pom Pom Trees
Step 1. Gather your supplies!
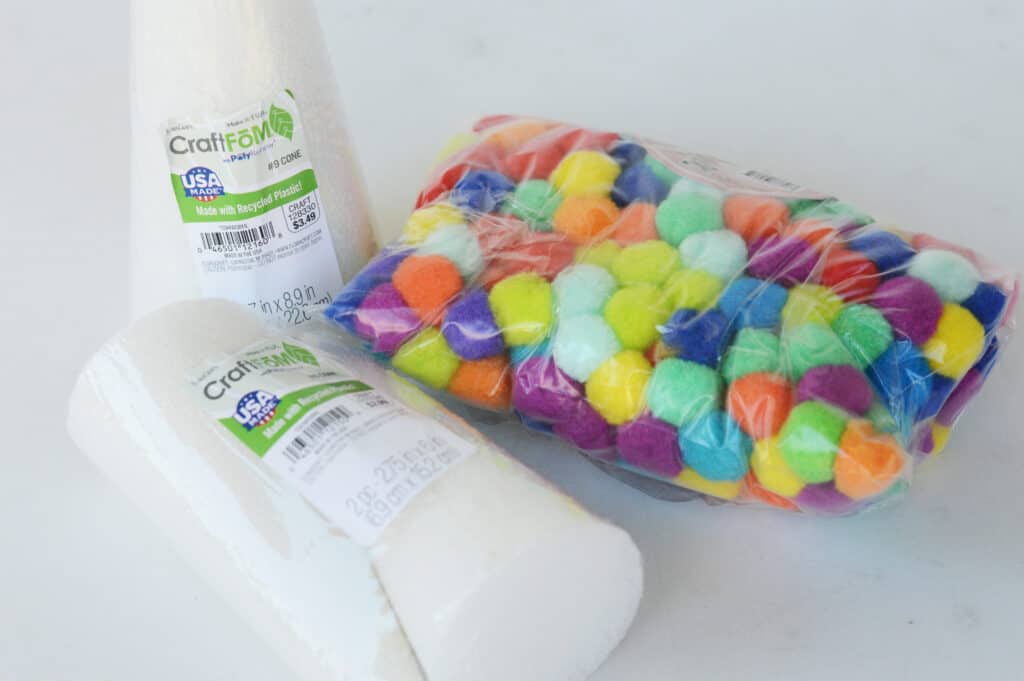
You will need:
- Pom Poms (we used these 1″ Pom Poms from Amazon)
- Styrofoam Cones
- Hot Glue Gun
Step 2. Use hot glue to attach the pom poms starting at the bottom. Do one row, all the way around, at a time. Stack the pom poms on top of each other with each new row, with no space between them.
Hold each pom pom onto the cone after gluing for a few seconds to ensure good adhesion.
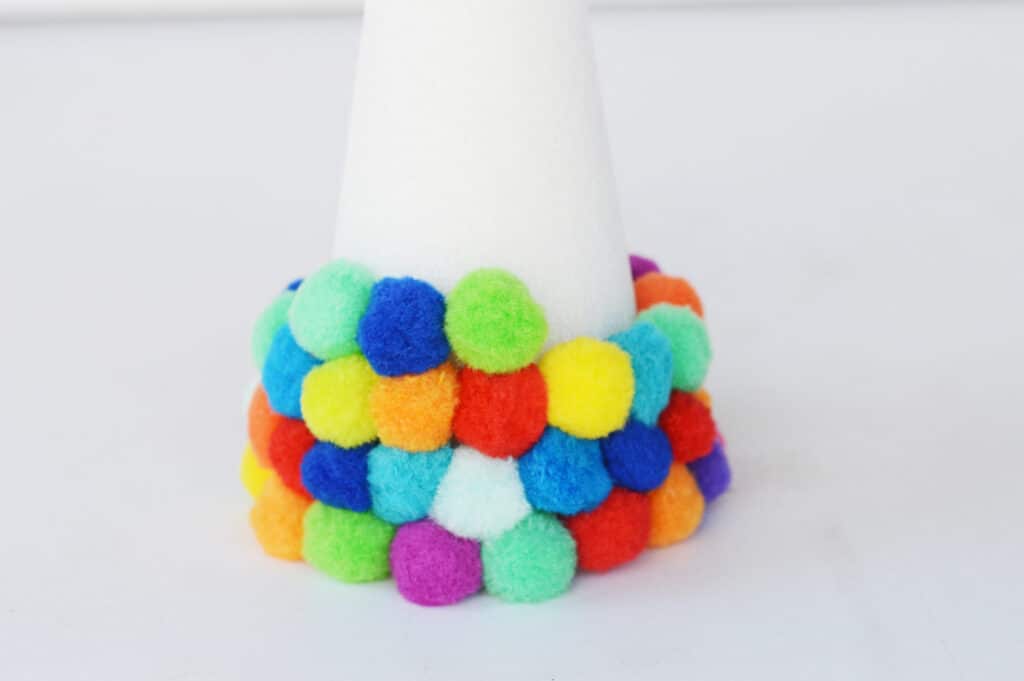
Step 3. Glue all the way to the top, with the final row going just above the top of the cone.

Step 4. Glue the last pom pom on top of your tree to cover the cone. You could also add a small star, or even little string of battery-operated fairy lights if you wanted to glam up your pompom Christmas tree even more!
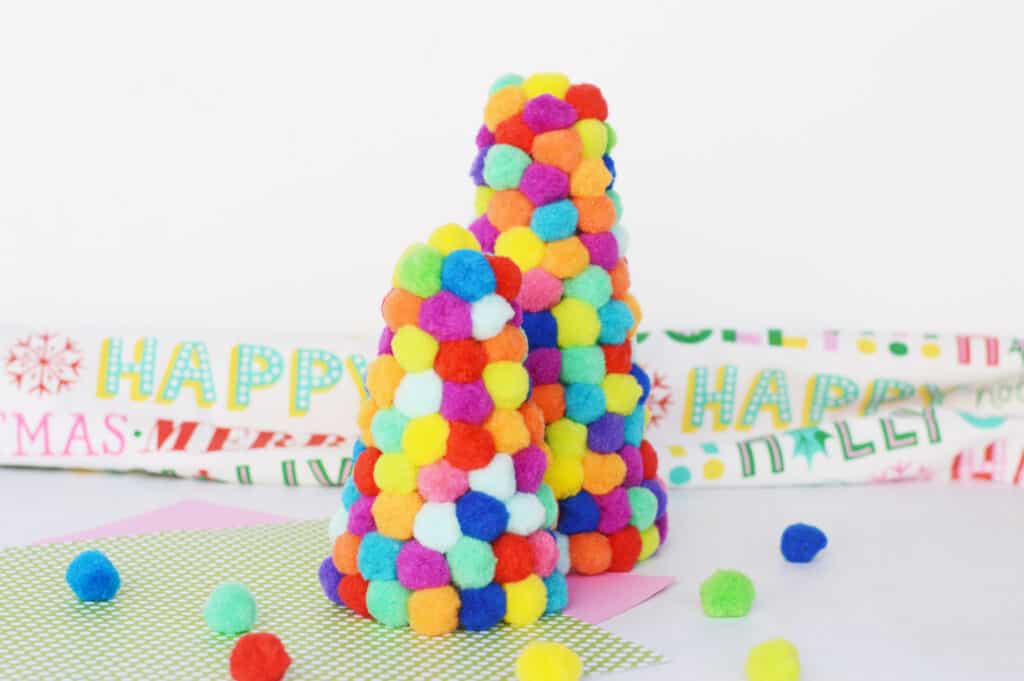
Once you finish gluing on all the pom poms, this is what your pompom trees will look like!
Christmas Pom Pom Trees Tips:
- Pom Poms. We used a bag of (250) 1″ Pom Poms and one bag completely covered a 4″ cone, and a 7″ cone with a few to spare.
- Time. These two Christmas pom pom trees took about an hour to make, all while documenting the steps for you with pictures along the way.
Want more Christmas ideas?


hi! I'm shannon
I’m a wife, mom of three, doctor, and blogger! In 2018, I decided to turn my mom blog, into a personal finance blog so others could follow along on our journey to pay off over HALF a MILLION dollars in student loan and practice start up debt. I hope you enjoy following along, and maybe even find some inspiration along the way.