This post may contain affiliate links, which means I earn a small commission if you purchase something I recommend- at no additional cost to you! As an Amazon Associate I earn from qualifying purchases. Thank you for supporting this blog! Full disclosure here.
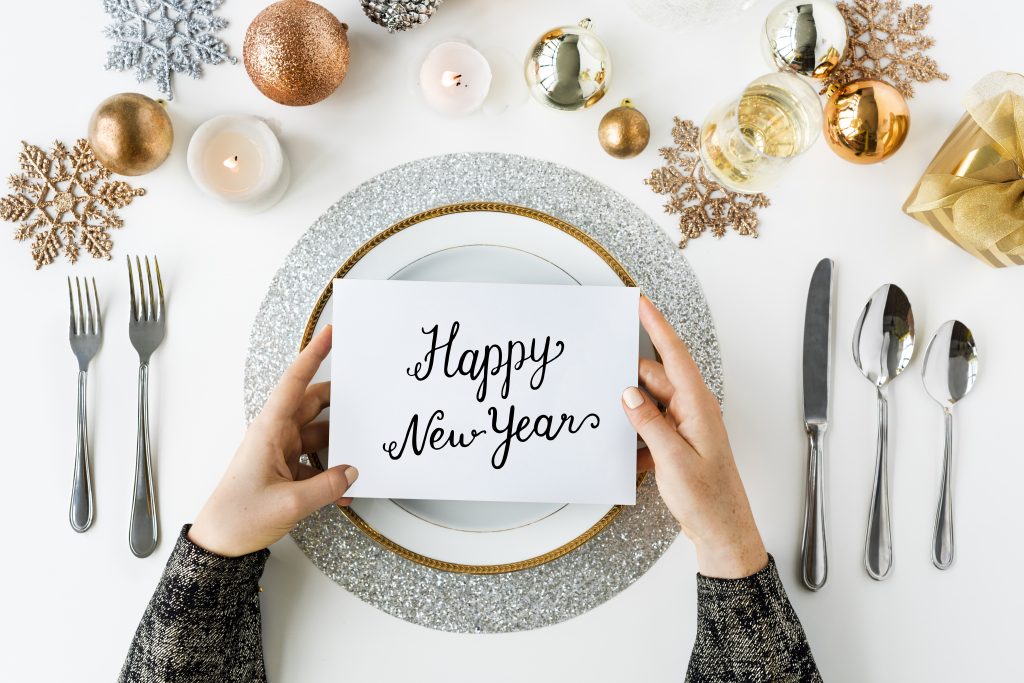
New Year’s Eve is almost here! If you’re on the hunt for easy, affordable DIY tablescape ideas for your next New Year’s Eve dinner party or gathering, you need to try these!

Picking a Theme for Your New Years Eve Party
When it comes to picking a theme for your New Year’s Eve party you have a lot of options, but you want to make sure everything goes together and that you don’t break the bank with decorations! There are many ways to throw a seemingly extravagant New Year’s party on a budget! Keep reading for some great DIY table designs for you to craft for your guests this holiday!
Decorating Your Tablescape On a Budget
If you’re trying to decorate on a budget, you may be worried that you can’t fulfill your perfect party vision with your allotted spending money, but I can assure you, you can! All it takes is some smart spending, crafty ideas, and creativity to complete your party ideas, no matter how grandiose they may seem.

Why DIY Decorations Are The Way to go!
Do-it-yourself decorations are the best way to go if you are planning a party on a budget because it costs less in the long run. Think about all those times you had to special order birthday cakes or cupcakes that were outrageously expensive.
To avoid that, you could have just looked up how to decorate your idea and done it yourself for much cheaper, likely with the same taste and quality. This can also be said for DIY decorations for your party! Party supply stores sell certain items for cheap and if you can find the materials to start with then you can make any idea of yours come to life for you and your guests this New Year’s Eve.
DIY Table Setting Ideas For New Years
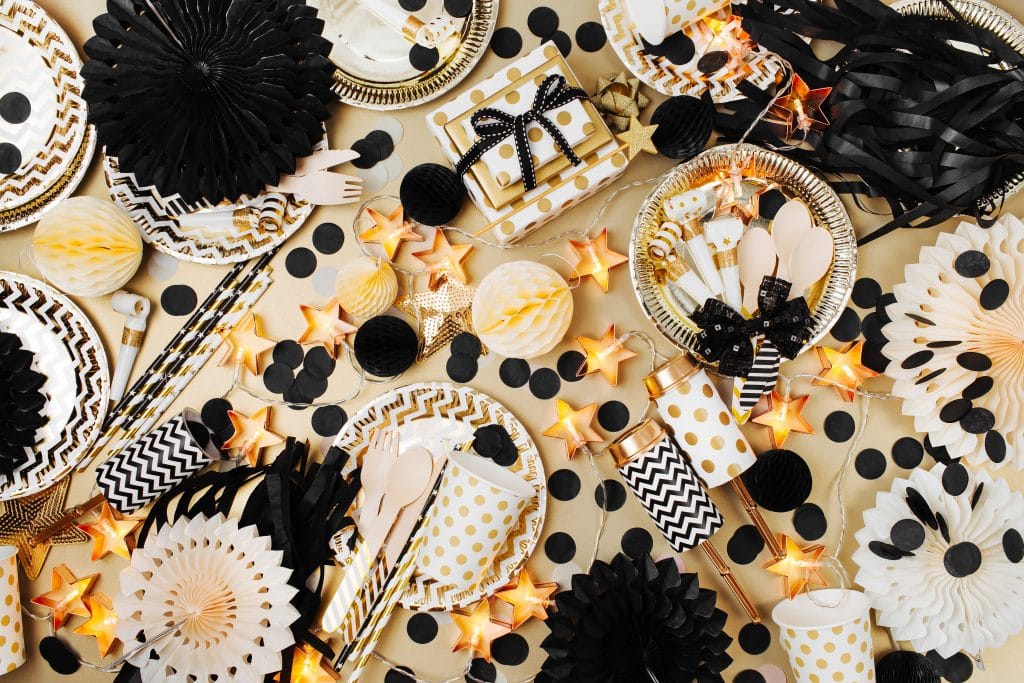
Tuxedo/ Black and White
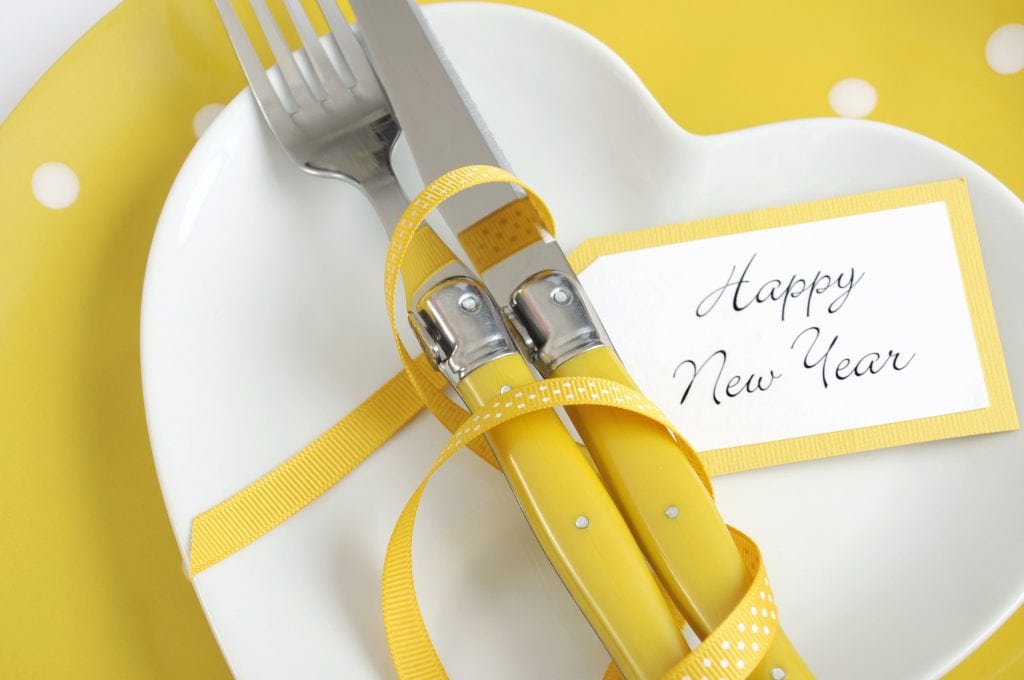
To make your party feel like a black-tie affair without the pressures that come with that, you can create a table setting that sticks to black and white designs. Black and white are easy to find materials for, and it looks effortlessly chic. You can set the table with white plates and black napkins, or any combination you choose.

You can even create bowtie napkin rings for each guest and use nontoxic craft paint to create wine glasses that look as if they’re wearing suits with bowties. You could also cut out colored felt to look as if the champagne or napkins are wearing suits. You can also create tiny top hats with construction paper to use as name placards.
Glitter/Confetti
Glitter and confetti may not seem like themes to you, but you can do a lot with them, and it is very festive for the New Year’s occasion! Whether you want to keep it monochromatic or give each guest a different glitter color, you can spread the festive adornments around, and glitter is very easy to get. You can use glitter glue to write names on the glasses or to write names on guest cards.

You could use confetti to sprinkle around the table to add color and spruce up a plain tablecloth. Plus, you can make confetti yourself by using a hole puncher and various colors of construction paper. You can use glitter paint to decorate the bottom of your guests’ glasses in different glitter colors. You can even incorporate edible glitter into the food or desserts you plan to serve!
Silver and Gold Stars
Stars remind us of wishes to be made, and what better way to celebrate New Year’s Eve than by wishing for the coming year to be the best yet. Stars are easy to achieve the shape, and you can create endless crafts with them! In any color, you want you can cut out star-shaped nameplates for your guests, and you can adorn your napkin rings with stars as well!

You can use regular construction paper and add glitter or you can use metallic paints or markers to create a metallic finish for your crafts. You can glue the stars you’ve made to string and create an elegant decoration to wrap around the table and draw everything together. If you’re looking to serve cupcakes, you could even create star-shaped cookies with edible glitter or metallic baking paints to go on top.
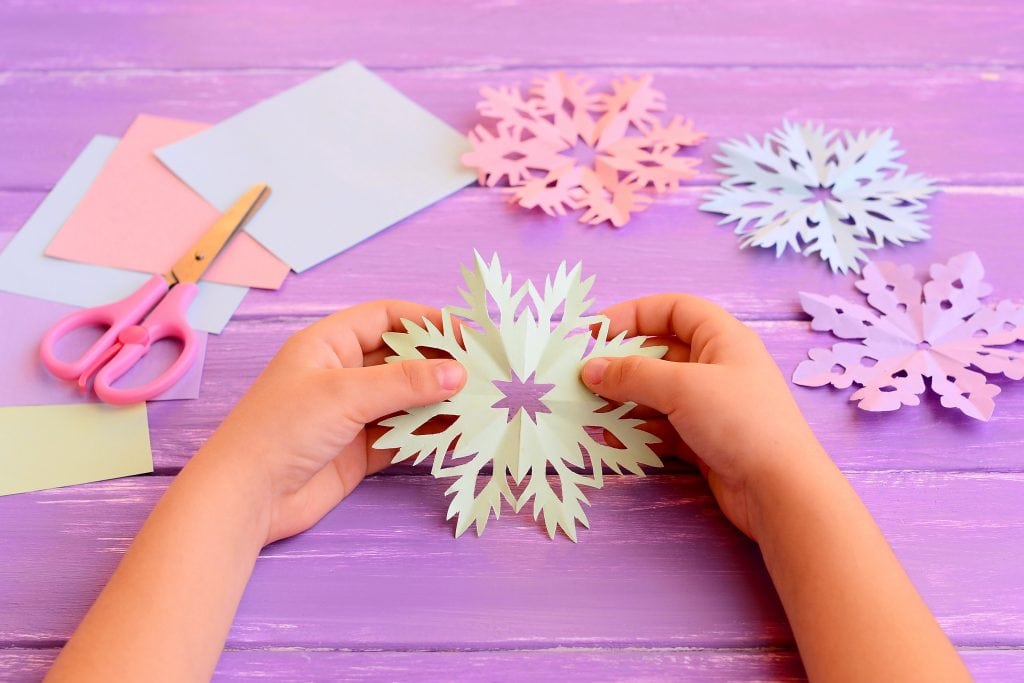
Winter Wonderland
New Year’s Eve happens in the wintertime, so it is a perfect excuse to continue a winter wonderland theme if that’s what you love! We all know how to make those cute paper snowflakes, and that is a great idea to use for table decorations. You can create a streamer of connected snowflakes out of a regular printer or construction paper and hang it around the table.
You can even cut out the snowflake shapes with felt or old cloth and create makeshift coasters. You can print out stencils of snowflakes to use to paint wine glasses and to draw on the napkin rings. Using colors like blue, white, and silver are great to make it feel like winter. You can also utilize your Christmas decorations for this theme since you may have old tinsel or white or silver wreaths that can be placed elegantly on the backs of chairs or along the sides of a dining room table.
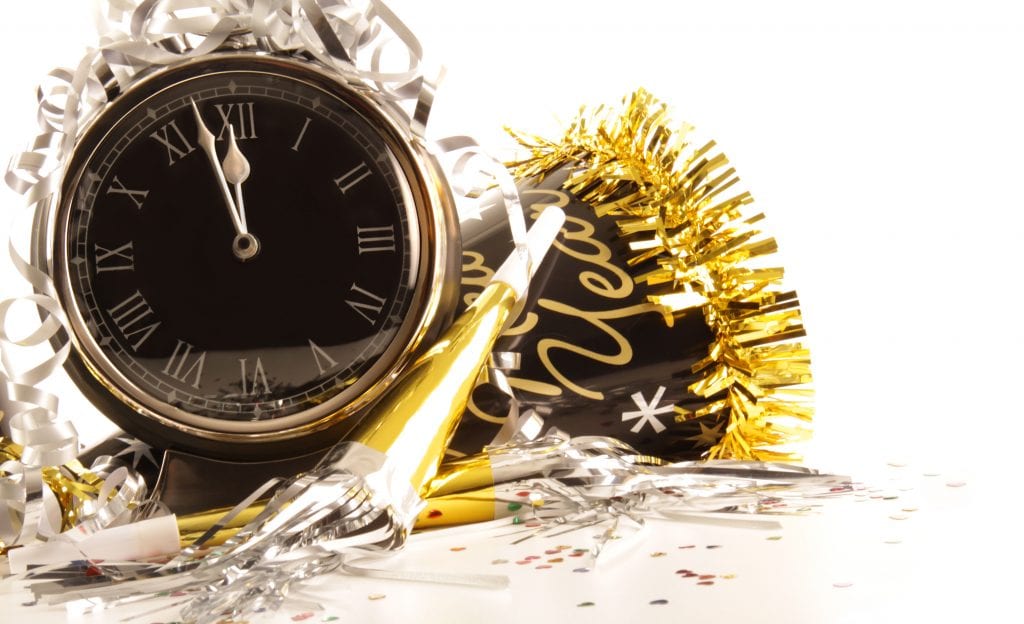
Clocks
The clock strikes midnight and lets us know the New Year is here, so what better theme than clocks! It might seem boring at first but you can make this simple theme work for you. Clocks are easy to draw and you can make many different crafts using this theme. You can draw and cut out clocks with poster board and paint them however you want, and hang them on the backs of chairs or along the table edges, you can even glue them to the side of your tablecloth if it is a disposable tablecloth.
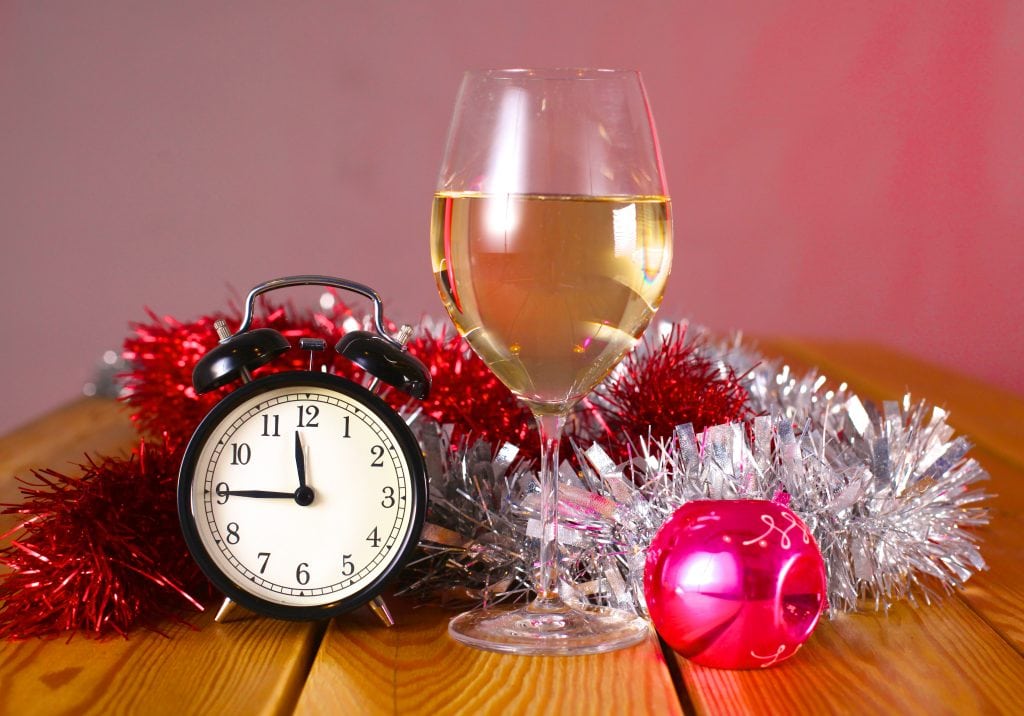
A fun way to incorporate this theme for each guest is to paint a unique clock on their wine glasses. You can even create circular placemats with a clock design by printing or drawing and putting together your own clock out of sturdy paper and then painting it with a Mod Podge sealant or coating it with a resin and letting it harden on a flat surface. This way, you have a shiny and food and stain-resistant decoration to go under each plate.
DIY Table Centerpiece Ideas For New Years
Handmade Star Bouquet
If you’re utilizing a star theme, or you just think something like this would look great at your table, then you can DIY a star bouquet. A fun way to do this is to either use popsicle sticks that you can paint with metallic or glitter paints and glue them to long skewers.

Another way to do this is to shape pipe cleaners into star shapes and glue them to skewers. You can also paint the skewers and decorate them with leftover pipe cleaners. Then all you have to do to display them is place them in a vase or glass jar that is weighted down on the bottom with sand, marbles, or rocks.
Top Hat Decoration
To go along with the tuxedo theme above, this is an easy-to-make centerpiece option. You can use a sturdy poster board or foam to cut out and glue together a cute DIY top hat and then decorate it to match your theme. Dust it with glitter, glue on feathers, or even write out Happy New Year! You can also flip it upside down and place a small vase inside as a unique way to display flowers or other decorations you want to utilize.
Christmas Decorations Reinvented
If you don’t want to try and make any more decorations but you think your old ornaments may match the theme you are trying to create then you can absolutely put them to good use! Whether it’s a tiny Christmas tree you can spray with fake snow and decorate or old baubles, you want to display, either can be a wonderful centerpiece.

If you have old baubles, you can simply pick out the colors and styles you want to display and place them in a large clear glass container. Alternatively, you can place them in a basket or a large wooden or glass bowl. That way, they are contained but can be easily seen.
Wine Bottle Centerpiece
Old wine bottles can be seen as trash or treasure, depending on your creativity. If you have old wine bottles or you have emptied them out to make sangrias for your party, then you can decorate them and display them as decorations! Paint them with glitter or metallic paints, or just a monochromatic color that goes with your theme. You want to make them look chic by painting them in a way that recreates the bottle as a decoration. You can also paint clocks, stars, or the numerals for the coming year on them and display your artwork as the centerpiece.
DIY Disco Ball
While disco may seem dead, you can bring it back to life with an exciting and fun disco ball centerpiece! This will be reminiscent of the ball being dropped in Times Square every New Year’s, but it will be of your own creation. All you need for this is a banana hanger or a similarly small stand which you can hang or slide your disco ball through. You will need a Styrofoam or regular foam ball, hot glue, and mirror tiles. If you can’t find mirror tiles, you can use large rhinestones or just paint the whole thing with glue and cover it in glitter.
DIY Table Gifts/Party Favors For Your Party Guests
Wine Charms
Wine charms are small, simple, and cute as party favors! Easy to make, and you can use many methods to create adorable charms for your guests. One cute charm to make is a tiny clock! All you will need are some old bottle caps, crafting epoxy resin and hardener, and some wire. You can draw or print out tiny clock images, which you can place in the bottle caps.
You can also paint the bottle caps a solid color to make it more cohesive. Once you place the clock image inside the bottle cap, you can pour the resin in and let it set. After it has dried and hardened, you can hot glue the wire to it or drill a small hole into the charm to feed the wire through.
Poppers
DIY poppers are a fun and affordable idea for party favors. All you need to make these are some confetti, which you can get by using a hole puncher on some of your unused construction paper or even old flowers or glitter. Then you will need a toilet paper roll, some balloons, and tape.
You will decorate the toilet paper rolls however you want, cut the top off of the balloon, and pull the balloon over the bottom of your decorated toilet paper roll, and tape it together. After that, you just add your confetti, and voila, you’re done!
Wine Glasses
This may not be a budget-friendly option for those hosting very large gatherings, but if you can find some plastic wine glasses wholesale, then this is a great idea for party favors! You can decorate each wine glass for your guests and add their names and whatever other painted designs and decorations you wish to add. Then you get to tell them that they can keep their customized glasses! Another fun idea is to let your guests decorate their glasses themselves so you also have a fun party activity.
Party Hats
Party hats really get everyone into the spirit of a party, so these are a great and inexpensive party favor to give out! Just like the wine glasses we mentioned above, you can decorate each party hat for each of your guests, even adding tinsel, gluing on some handmade decorations or the date of the coming year, and of course, glitter! You can let your guests customize and add to their own party hats or you can make them special for each guest.
DIY Treat Boxes
Giving candy, chocolate, or even fortunes you have created yourself are great ideas for party favors, but to make them unique you can create DIY pillow boxes for your treats out of old toilet paper rolls. All you need for this DIY is old toilet paper rolls, colored ribbon or string, tissue paper, old wrapping paper, or washi tape.
This craft takes just a few minutes, and all you have to do is flatten the toilet paper roll, decorate the roll however you want, and fold over the top so that it closes one side of the roll. From here, you can carefully place the treats you want to give inside and then do the same to the other side, closing the roll. Then to finish it off you just tie a ribbon or string around the ends and put a name tag on it!
General Table Set Up Ideas
Basic Setting
The basic table setup design is great for small casual parties with limited drinks and courses. The table setting includes bare necessities and less fanciful silverware options. You can include a placemat or not, which the plate will be sat in the middle of. You include a napkin, folded on the left of the plate with a fork on top of the napkin (salad fork is optional). A knife is placed to the right of the plate with a water glass above the knife, and an additional glass (champagne or wine for this occasion) above and slightly to the right of the water glass.
Casual Setting
The casual table setup is slightly fancier than the basic one and includes more glasses and silverware. Set up is similar to the basic in that it includes a placemat upon which the plate is set in the middle. From there a dinner fork is placed to the left, and the optional salad fork is placed to the left of that.
A bread plate and butter knife are added above the forks. A folded dinner napkin is placed in the center of the serving plate. To the right of the serving plate are a dinner knife, soup spoon, and a teaspoon in that order. Above those utensils is a water glass with a wine glass to the right.
Formal Setting
Formal table set up is, as it sounds, for very formal occasions. This means weddings, fine dining, or any important event in which you want to make the best impression. It includes the most amount of silverware and glassware out of all of the table settings. A placemat is optional but the serving plate remains in the middle of the setup. On top of it will be the folded dinner napkin and a place card or menu card.
Once again, the dinner fork will be placed to the left of the serving plate, with a salad fork placed to the left of that. Above the forks will be the bread plate and bread knife. Above the serving plate, there will now be a dessert fork that will face the prong side to the right and a dessert spoon above the fork with the spoon side facing to the left.
To the right of the serving plate, there will be a dinner knife, fish knife (if applicable), salad knife, soup spoon, and a teaspoon, in that order. Above the right-side utensils will be the water glass, and directly to the right of the water glass will be a white wine glass. Above those two and forming a triangle will be the red wine glass, to the right of which will be a champagne flute. If applicable, a cup and saucer will be placed just below these glasses and to the lower right.
Buffet Setting
A buffet table setting may be even easier than the basic table set up as it requires little to no table set up, with only the buffet table itself being set. If you wish to include silverware and glassware on the table with guests only retrieving their serving plates, then it will be a similar setup to the basic but without the serving plate.
You will have a napkin and place card or menu card in the middle, to the left will be the dinner fork and the salad fork. To the right of the place, a card will be the dinner knife and soup spoon. Above that will be the water glass with the wine glass to the lower right. From here, your guests will just enjoy going to pick up their plates from the buffet table and getting the food of their choice before sitting back down and having their utensils and glassware ready to go.
Five Course Setting
This table setup is very similar to the formal guidelines but will include a couple of extras. As the title indicates, this setup is for those who plan to host a five-course meal which generally consists of soup, salad, a fish course, the main dinner course, and dessert.
To begin you will place a serving plate in the center with the folded dinner napkin and place the card on top. To the left, you will include a dinner fork, a fish fork, and a salad fork. To the right, you will include a dinner knife, a fish knife, a soup spoon, and a teaspoon. To the right of the teaspoon will be a cup with a saucer beneath it.
To the upper right of the serving plate, above the dinner knife, will be the water glass, to the right of that will be the white wine glass, and above those in a triangle will be the red wine glass. To the right of the red wine glass will be a champagne flute, and to the left of the red wine glass, slightly more forward, will be a sherry glass.
I hope you loved these New Years’ tablescape ideas I shared with you. There’s a lot of categories and options to choose from that you can just pick whatever theme you and your friends or family will have that night and just go with it!
Your Guests Are Sure To Be Wowed When They See Your DIY New Years Decorations!
More New Year fun:
hi! I'm shannon
I’m a wife, mom of three, doctor, and blogger! In 2018, I decided to turn my mom blog, into a personal finance blog so others could follow along on our journey to pay off over HALF a MILLION dollars in student loan and practice start up debt. I hope you enjoy following along, and maybe even find some inspiration along the way.